


Quilted Journal & Notebook Cover Project

Quilted Journal Cover
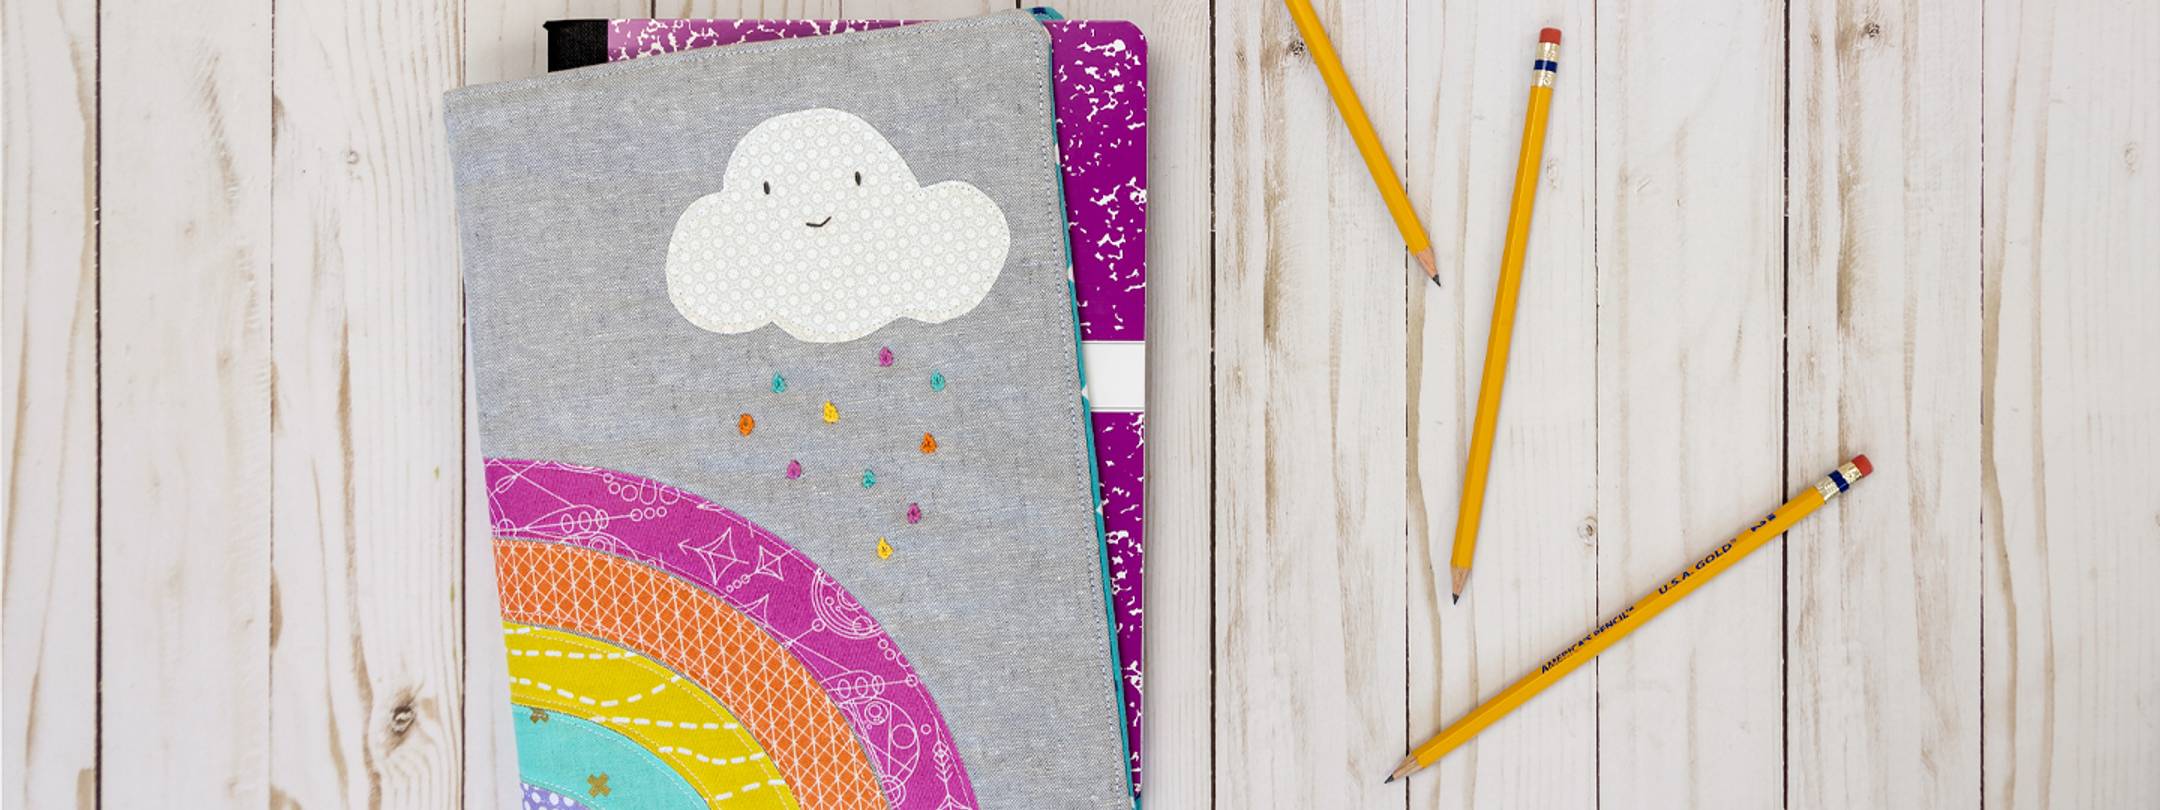
Doesn’t this rainbow composition book cover just make you smile? And smiles during homework time are a very good thing! Learn how to use our Omnigrid OmniArc™ ruler to create the colorful arcs of the rainbow to complete this easy journal cover project. How? The ruler is unique in that it has curved grooves to guide your rotary cutter as you cut – it’s easy to create perfect arcs and circles. It’s a clever fabric cutting technique to master to use on this project and many others.
Supply List
- Fabric, Interfacing, Paper-Backed Fusible Adhesive and Ribbon – see sizes needed in step 1
- Embroidery Floss
- Omnigrid OmniArc™ Circle Cutter Ruler
- Omnigrid 28mm Rotary Cutter
- Omnigrid 18” x 24” Cutting Mat
- Dritz Water Soluble Fabric Marking Pen
- Dritz Point Turner
- Dritz Embroidery Needle
- Omnigrid 4” Needlecraft Scissors
- Marble Composition Book
Step 1: Prep all of your fabric, ribbon and interfacing as listed below. Gather the cut pieces of fabric for the rainbow and line up the vertical and horizontal sides of the fabric with the radius lines on the OmniArc ruler before you begin cutting the arcs.
- Cut 1: 11” x 16.25” fabric for outer cover
- Cut 1: 11” x 16.25” fabric for lining
- Cut 2: 11” x 10” fabric for interior flaps
- Cut 2: 11” lengths of ribbon (will be used on interior flaps)
- Cut 1: 11” x 16.25” Thermolam® interfacing (fusible fleece)
- Cut: ¾ yd of paper-backed fusible adhesive
- Cut 1: 7” x 14” pink fabric for rainbow
- Cut 1: 6” x 12” orange fabric for rainbow
- Cut 1: 5” x 10” yellow fabric for rainbow
- Cut 1: 4” x 8” aqua fabric for rainbow
- Cut 1: 3” x 6” purple fabric for rainbow
- Cut 1: 5” x 5” white fabric for cloud

Step 2: Cut 5 pieces paper-backed fusible adhesive the same sizes as your rainbow fabrics. Fuse the paper-backed fusible adhesive to the wrong side of your rainbow fabrics according to manufacturer directions.
Step 3: Fold the pink fabric in half, wrong sides together, so it now measures 7” x 7”.
Step 4: Align the ruler with the left side and corner of the fabric along the radius lines on the ruler.

Step 5: Hold the ruler tightly and cut an arc along groove #6. Start at the bottom of the groove and work up toward the top. Keep the ruler in place and make another cut along the #5 groove. You should now have a perfect rainbow arc. Put the rest of the pink fabric aside, saving it for another project down the road.

Note that the yellow fabric shown is illustrating the 3 pieces of fabric you should have each time you cut an arc: a top corner (save for another project), the middle arc (use for your rainbow), the center piece (save for another project).
Step 6: Repeat the arc-cutting process with the remaining 4 rainbow fabric colors. Fold each fabric in half, line up on the radius and make two cuts as noted below. (Each arc will be smaller than the one before it; the purple fabric will be a half circle.)
- Orange fabric: cut along #5 and #4
- Yellow fabric: cut along #4 and #3
- Aqua fabric: cut along #3 and #2
- Purple fabric: make only 1 cut along #2

Step 7: Fold the outer cover in half and crease gently to find the center. Open and lay flat.

Step 8: Remove the back paper from the rainbow arcs.
Step 9: Center the pink arc on the outer fabric cover, lining up the bottom edges of the arc with the bottom edge of the outer cover.
Step 10: Fuse the pink arc in place.
Step 11: Build the rainbow repeating steps 8-10 for the remaining arcs.


Step 12: Fuse the outer cover onto the Thermolam® interfacing according to manufacturer directions.
Step 13: Topstitch along both sides of each arc with a ⅛” seam allowance.

Step 14: Fuse a piece of 5” x 5” paper-backed fusible adhesive onto the wrong side of the white fabric. Draw a cloud shape and cut it out.
Step 15: Position the cloud above the rainbow to the right. Be sure to leave a 1” margin between the cloud and the edges of the outer cover. Fuse onto fabric and topstitch along all sides of the cloud with a ⅛” seam allowance.
Step 16: Using a water soluble fabric marking pen, draw eyes and a mouth on the cloud. Hand embroidery the details on the cloud.

Step 17: Using the fabric pen, draw 9 raindrops falling from the cloud.
Step 18: Using embroidery floss in colors of your rainbow, stitch the raindrops.

Step 19: Fold each 11” x 10” inner flap piece in half so the flaps now measure 5” x 11”. Place a length of ribbon ¼” in from the folded edge and topstitch along both sides to secure.
Step 20: Repeat for the other flap.

Step 21: Place flaps on lining panel, lining up raw edges. Baste in place.
Step 22: Place the outer fabric cover, right sides together, over the lining fabric. Pin.
Step 23: Stitch around all sides with a ¼” seam allowance leaving a 5” gap for turning along the right side. Backstitch at the beginning and end.
Step 24: Clip corners and gently turn right side out, poking out the corners with a point turner. Push opening seam allowances to the inside. Press both sides.
Step 25: Topstitch along the perimeter with a ⅛” seam allowance making sure you stitch the opening on the side closed.
Step 26: Slide your marble composition book into the flaps and you’re all set!

Enjoy your colorful new rainbow journal! And get creative! You could use this same rainbow concept on other fun kids’ items … what about a rainbow pillowcase or wall hanging? There’s no limit to what you can do once you’ve learned how to cut fabric arcs and circles.